


How to Prepare for Home EV Charging

How to Prepare for Home EV Charging
Do you know how to prepare for home EV charging? Your primary concern after purchasing an electric vehicle is where, when, and how to charge it. With the ease and practicality of charging at home, the first place EV owners look is their own garage—and rightly so! Now that you can avoid trips to the gas station, what could be more logical and satisfying than starting each day with a full tank?
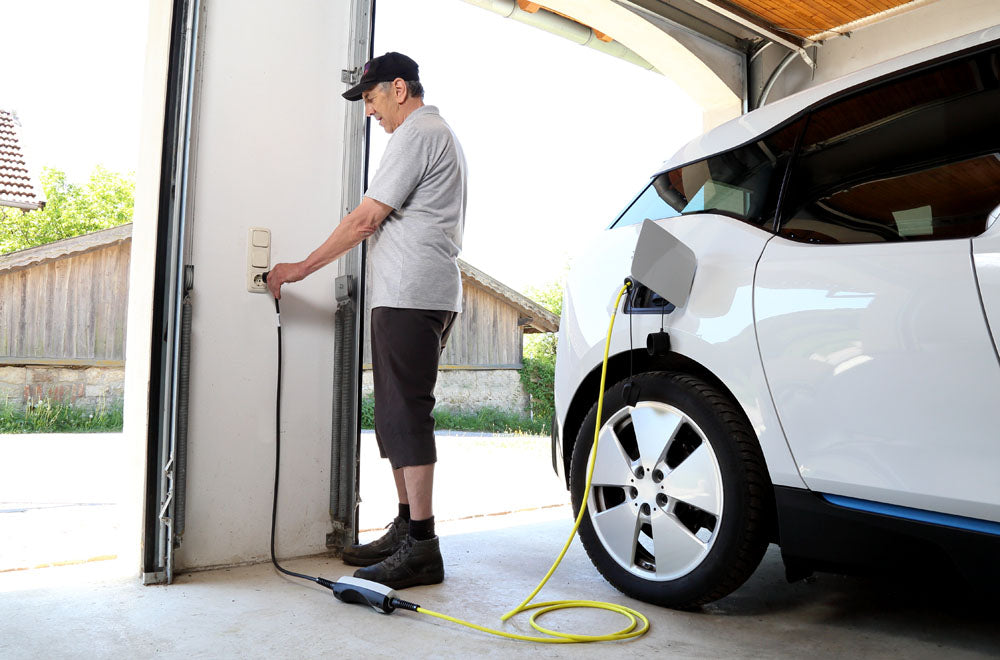
If you’ve decided to go with Level 1 charging using the standard 120v outlet, simply plug in your charger and start the process. Unfortunately, for a modern EV with a range in excess of 200 miles and a full-charge time (from empty) of up to 50 hours, Level 1 charging is considered far too slow. Consequently, most EV drivers opt for Level 2 charging. (For a detailed discussion of Level 1 and Level 2 charging, see the earlier post, EV Charging Types Explained.)
The short story is that Level 2 charging involves using a 240v socket. It’s certainly a lot quicker, with charging times typically in the 5 to 7 hours range for a full charge. Unfortunately, the setup process for Level 2 fast charging has traditionally required the installation of a dedicated 240v circuit, which is a time consuming and expensive process. But with the new Splitvolt Splitter Switch, you can skip this onerous task entirely by intelligently sharing your existing dryer socket with your EV charger.
However, if you don’t have a dryer socket available, you may still need to install a dedicated EV charging circuit. Here’s a rundown of key steps and considerations to understand before launching into EV Level 2 fast charging from your own garage.
Step 1: Locate your power Panel
The most common system for new and electricity-upgraded homes today is the 100 Amp power panel. You can discover the capacity of your panel quite easily. Just look at the amperage printed on the main circuit breaker that controls the inflow of electricity for the system.

Step 2: Audit Your Power Consumption
The AMP rating is a maximum usage indicator. It’s important to understand how much electrical energy your home consumes before implementing a 240v Level 2 EV charging system. This is because the new charger consumption, when added to the existing appliance consumption, may overload your electric distribution panel. There are a number of ways of doing a ‘home electricity audit’. The Department of Energy has a useful guide for undertaking the process. This link – Estimating Appliance and Home Electronic Energy Use, will step you through the task.
Keep in mind, it’s unwise to take the panel beyond 80% of its capacity. For example, say you find you have a 100 Amp panel installed in your house. Your audit of current consumption indicates a total of less than 50 Amps. You have headroom (excess capacity) of nominally 50 AMPs for a Level 2 EV charger, however, any additional circuit should draw a maximum of around 30 Amps.
Step 3: Contact Electrician & Review Power Panel
If your home electricity audit indicates you have sufficient available capacity, then your next step could be one of the following:
- Add a dedicated 240 volt plug, or
- Add a hardwired circuit back to the power panel.
Both of these are best accomplished by an electrician and can cost several hundred dollars, potentially more than the cost of the EV charger itself.
Significant additional costs might be incurred, however, if you discover that your power panel is not up to the task. In this case you will need to upgrade it to a higher amperage. This work can cost between $1000 and $3000, depending on the complexity of your system. In a worst-case scenario, your electrician may advise that you also need new cabling back to the power-pole in the street for additional capacity. Such infrastructure upgrades will, of course, add considerable expense. This often involve ancillary costs, such as the removal of concrete, so be prepared.
A 30 Amp charger will allow you to add charge to your EV at around 21 miles of range per charge hour. This is more than enough to fully charge the highest capacity EV overnight.
Step 4: Buy Suitable Level 2 EV Charger
You’ll want to purchase an EV charger that meets three key criteria:
- Capacity. For modern EVs with very long ranges (over 250 miles)—such as the Tesla Model 3, the Nissan Leaf, and Chevy Bolt—it’s useful to have a high-capacity charger to get the battery filled quickly. You also need to ensure the capacity of the charger you buy fits the electricity supply headroom available on your main power panel. Most homes have access to a 30 amp circuit, which means a 24 amp 240-volt Level 2 charger will be the right option. But if you have a 50 amp circuit available, you’ll be able to support an even faster 40 amp charger.
- Safety. Only buy a charger certified by the National Electric Code (NEC).
- Connector support. Make sure the charger you buy supports the NEMA connector type available in your home. Typically, this will a 10-30, 14-30, or 14-50 socket.
Splitvolt’s range of low-cost EV chargers has all the options you need to find the right charger for you!
Your Low Cost EV Charging Option
There is a cheaper alternative for Level 2 EV charging. For many electric car owners, their home has an easier, more economical way to access Level 2 charging. This method saves incurring the hassle and expense outlined above. Most homes in the US already have a 240v 30 Amp power socket in their garage. This socket is typically referred to as the ‘dryer plug’ and is used to power clothes dryers. One simple solution to the Level 2 EV charging problem is to purchase a 30 Amp charger that has the required plug to connect directly to this existing socket. To charge your EV, simply unplug the dryer and plug in your EV! You don’t have to worry about maximum power ‘budgets’, as the system is already configured to cope with the 30 Amp dryer load. If you have already have a dedicated 50-amp circuit installed, you’ll be able to use a 40 Amp charger.
Below are images of the two most common ‘dryer-plug’ sockets, as well as a NEMA 14-50 socket, which is used for 50-amp circuits. First the NEMA 14-30 and second the NEMA 10-30—already installed in millions of garages across the United States. For a more detailed explanation of the variety of US NEMA Sockets for charging your EV read this post, or review the range of US EV socket interface types at our gallery.


Are you Prepared for Home EV Charging?
Make sure you check to see if you have one of these dryer sockets available before undertaking any expensive EV charging preparations! Paying attention to your existing garage outlets can really help you prepare for home EV charging!
You might also like to read…
-
/